
Installation of Debian Linux on a Sony Vaio VGN-T1XP Notebook
![]()

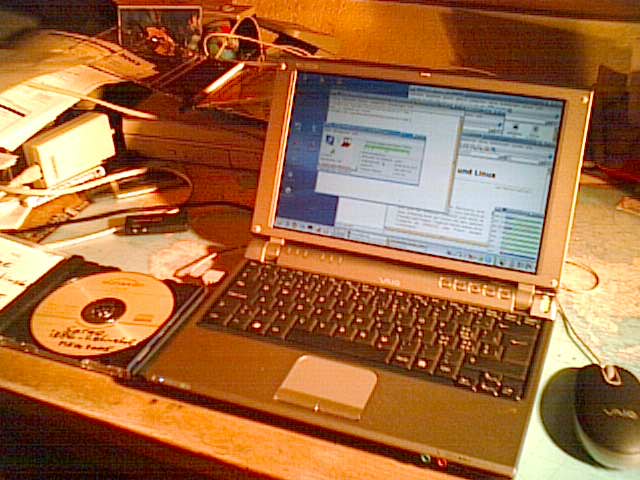
Size: 27cm x 21 cm x 3.5 cm Weight: 1.38 kg
This is a short HOWTO on how I installed Debian Linux on a Sony Vaio
VGN-T1XP laptop (or notebook, or, as I was told, a sub-notebook!).
The system is now dual-bootable: after startup, one may choose among
WindowsXP and Linux.
Summary: Experience with Debian Linux (Sarge) on the Sony Vaio VGN-T1XP
The overall experience after a few days only is just great: It took some time
to configure things, but meanwhile the following is running:
Intel Pentium M processor 1.1 GHz - SpeedStep (with powernowd) -
10.6" WXGA (1280x768) X-black-LC-Display - Intel 855GM graphics chip -
touchpad - USB-wheel mouse - Sound with Intel 82801DB/DBL/DBM AC'97 Audio
Controller (incl. headphone) -
DVD+-RW drive - Intel PRO/100 VE ethernet controller -
Intel PRO/Wireless 2200BG - USB (tested with a USB mouse and a USB memory stick)
- Cisco Aironet 350 WLAN card in the PCMCIA slot -
dimming the brightness of the screen - suspend to RAM (kernel 2.6.11) -
battery: runs for more than 5 hours with WLAN ON and powernowd enabled
(see below in section 'powernowd' (the official value is 6.5 hours)
Not yet tested: Firewire - Bluetooth - external monitor (needs i55crt) -
suspend to disk
Not running: Suspend to RAM with kernel 2.6.10 -
with kernel 2.6.11 it does!
Why this Notebook?
I was using a Dell Inspiron 8200
for some years, but for travelling this laptop with a weight of about
3.8 kg was just too heavy. So I was looking for another laptop or notebook
with much less weight. What I need when travelling is: low weight,
possibility to browse on the web, login via SSH to home computers in order
to read my e-mail, and to write documents.
Today, laptops are equipped with faster CPUs and larger screens from month to
month. They are most probably used at home instead of a desktop PC. But because
they become heavier they are less suited for usage when travelling.
The small and light weighted sub-notebook from SONY, model Vaio VGN-T1XP,
came just right to me with a weight of about 1.38 kg.
Equipment as it is delivered
The sub-notebook is delivered with a small, but nice-looking hardware,
with Windows XP Professional as operating system, plus lots of software
already installed. Besides integrated WLAN, there is also a RJ-45 connector
for a LAN-cable (although this is not mentioned on some official webpages).
The device is handy and can easily be carried with a few fingers of one hand.
The PC (under Windows XP) works nicely connected both via LAN-cable and with
wireless LAN, even when using encryption (WEP).
Technical Data (in German)
Installing Debian Linux
Debian GNU Linux was installed on this laptop as follows:
1. Power-on the Vaio (my version was already used in a demonstration
room of the company Comdat and therefore
I did not have to choose the language) under WindowsXP.
2. Start the PC and click on 'Start' and on 'Vaio-Vorbereitung' (Prepare
your Vaio).
3. Defragment the partitions C: and D:
4. Booting with a SuSE Linux (9.0) installation DVD I reduced the partiton D:
to about 9.5 GB, and formatted the rest of the 40 GB disk with 1 GB swap and
the rest of disk the filesystem ext3.
The same could probably also be done with other software, to modify the size
of partitions.
5. For the actual installation of Debian Linux, I took a rather old
net-install version of 'Sarge' from March or April 2004, which I once burnt
on a CD.
6. The installation (while connected to a LAN cable) was without problems.
Kernel
The first installation was with a kernel 2.4.25.
I upgraded to kernel 2.6.8, currently the newest version of 'Sarge'.
Another upgrade to 2.6.10-1-686 was necessary, because otherwise I did not
manage to bring up kdm and KDE with the full screen size. In order to have
suspend-to-ram running, it was nessesary to install kernel 2.6.11; so we enter:
apt-get install kernel-image-2.6.11-1-686 kernel-source-2.6.11 kernel-headers-2.6.11-1-686
followed of course by entering:
cd /usr/src; tar jxvf kernel-source-2.6.11.tar.bz2; rm linux; ln -s kernel-source-2.6.11 linux
Note, after upgrading from 2.6.10 to 2.6.11, the sound configuration needs some
changes; see below in section 'sound'.
X11
To get full screen resolution, you will need the software 855resolution. I downloaded version 0.3, stored 855resolution-0.3.tgz and did the following:
1. gunzip 855resolution-0.3.tgz
2. tar xvf 855resolution-0.3.tgz
3. cd 855resolution
4. make
5. make install  # copies 855resolution to /usr/sbin
6. ./855resolution 5c 1280 768
7. Wow !! The full screen is used!
   (You have to logout and restart your X-server with cntl-alt-backspace)
8. In order to have this setup each time after boot, create (as root) a file
   /etc/init.d/855resolution
8. Since the executable lies in /usr/sbin/855resolution, the file looks as
   follows:
#!/bin/sh -e
# /etc/init.d/855resolution      Urs Kradolfer, 9Mar2005
test -x /usr/sbin/855resolution || exit 0
case "$1" in
start|restart)
    /usr/sbin/855resolution 5c 1280 768
    ;;
stop|reload|force-reload)
    ;;
esac
9. Create a link, so this script is executed at each boot:
   cd /etc/rc2.d
   ln -s ../init.d/855resolution S90855resolution
The file
/etc/X11/XF86Config-4 is available here. You may have to modify the
keyboard specification; this version is for a Swiss German keyboard.
And you have to save it as /etc/X11/XF86Config-4.Sound
Sound works fine with kernel 2.6.11; if you have kernel 2.6.11, just read
and follow points 1, 5, and 6 only in the list below.
Should you use 2.6.10, the alsa sound
system with Intel's 82801DB/DBL/DBM AC'97 Audio
Controller needs some special configuration for the appropriate modules
to load (and to not load); we experienced the same already on our 'Dell
Inspiron 8200', where the same procedure was necessary:
1. Install the ALSA soundsystem. If I enter 'dpkg -l | grep alsa' today, the
   following lines appear:
   ii  alsa-base      1.0.8-7        ALSA driver configuration files
   ii  alsa-utils     1.0.8-3        ALSA utilities
   ii  alsaplayer     0.99.76-0.3    PCM player designed for ALSA
   ii  alsaplayer-com 0.99.76-0.3    PCM player designed for ALSA (common files)
   ii  alsaplayer-gtk 0.99.76-0.3    PCM player designed for ALSA (GTK version)
   ii  alsaplayer-oss 0.99.76-0.3    PCM player designed for ALSA (OSS output mod
2. In the file /etc/hotplug/blacklist add a line at the bottom with: snd_intel8x0m
3. In the file /etc/modules add on two separate lines:
snd_ac97_codec
snd_intel8x0
4. After a reboot the sound should work properly.
5. Well, please note, that there is a sound on/off-switch on the front of the
   notebook; it should be set to 'on' (orange LED is then off)
6. One thing mentioned on several webpages is also important: run alsamixer, press the right-arrow-button until you see the 'External' on the botton line and until 'External' changes to red letters. Now press 'm' in order to 'mute' the 'External Amplifier' (external amplifier must be set to 'off'). Press 'Esc' to leave 'alsamixer'.
Playing DVD movies
Playing DVD movies works fine, when e.g. using the program totem.
However, after clicking on the pull-down-menu 'Movie' and 'Play Disc' you may
get the error message 'Failed to play Audio/Video Disc - Failed to open
device /dev/hdc for reading: Permission denied'.
You may resolve this by two ways: make yourself to user=root and start e.g. the
program 'totem' in order to view the DVD. The second (and better) possibility is
to enter as user=root your username in the file /etc/group as
follows:
cdrom:x:24:hal,username
The reason is, that /dev/dvd is a link to /dev/hdc and this
device file belongs to user=root and group=cdrom. So by adding the user
username to the group cdrom, allows this user to read from the
DVD-device and viewing the DVD should be possible.
However, should you - upon starting the movie - get the message
"Totem could not play 'dvd:/'. The movie could not be read", then you
probably have a copy-protected DVD. Since you have paid for the DVD, you should
also be able to view it! You now should do the following:
- Add the following two lines to your file /etc/apt/aources.list
# For reading encrypted DVDs:
deb http://download.videolan.org/pub/videolan/debian woody main
- Then enter: apt-get update; apt-get install libdvdcss2
Now you may view the DVD - the sound volume may be a bit low, but you may increase the volume by starting 'kmix' and increasing the volume with the slide-bar.
LAN connection
Configuring the LAN (cable) ethernet interface is relatively easy, but you have to note, that there is a change between kernel 2.6.10 and 2.6.11! For kernel 2.6.10 the LAN interface is 'eth0', while for kernel 2.6.11 the LAN interface is 'eth1'! Create a file /etc/network/interfaces with the content
auto lo
iface lo inet loopback

iface eth1 inet dhcp    # eth0 if you use kernel 2.6.10
This works, if you use a DHCP connection (the nearest router provides your PC with an IP-address).
auto lo
iface lo inet loopback

iface eth1 inet static    # eth0 if you use kernel 2.6.10
   address 192.168.0.16       # modify to your situation
   netmask 255.255.255.0      # modify to your situation
   network 192.168.0.0        # modify to your situation
   broadcast 192.168.0.255    # modify to your situation
   gateway 192.168.0.1        # modify to your situation
Please note, that we do not have a line with 'auto' in the interfaces file for the interface eth1.; this means, the network is not started automatically at boot-time. With this we avoid a long waiting time during the boot process, where a message, such as Starting MTA: appears and the boot-process waits for a long time.
WLAN - wireless networking
Wireless LAN (WLAN) turned out to be a tricky thing...
Especially, since there is again a change between kernel 2.6.10 and kernel
2.6.11: the interface of the internal wlan is 'wlan0' for kernel 2.6.10,
while it is 'eth0' for kernel 2.6.11!
You may find out, what your wlan-interface is, by entering the command:
iwlist scan
In order to install the appropriate driver for the internal WLAN interface,
visit http://ipw2200.sourceforge.net/
and read the INSTALL information. Download the newest version of ipw2200
(I took ipw2200-1.0.1.tgz, the newest version is ipw2200-1.0.3.tgz) and
also download the latest binary firmware image (in my case I clicked
on v0.19-current, clicked on 'I agree' and got ipw2200-fw-2.2.tgz).
- Put the two compressed tar-files into /usr/local/src
- cd /usr/local/src
- tar zxvf ipw2200-1.0.3.tgz
- cd ipw2200-1.0.3
- make
- make install
Now the firmware... we better put this stuff in a separate directory:
- mkdir ipw2200-firmware
- mv ipw2200-1.0.3.tgz ipw2200-firmware
- cd ipw2200-firmware
- tar zxvf ipw2200-fw-2.2.tgz
- cp -p *.fw /usr/lib/hotplug/firmware/
Make sure you have sysfs mounted (see description in the INSTALL file)
- modprobe ipw2200
- In the file /etc/modules add the following:
# for internal wlan:
ipw2200
The most important issue is, that the internal WLAN-interface must be
configured as 'wlan0' (kernel 2.6.10) or as 'eth1' (kernel 2.6.11) !
In addition, it is important that besides the file
/etc/network/interfaces and the file /etc/resolv.conf
also corresponding iwconfig-commands are entered (see below).
The file /etc/network/interface should look as follows for a wireless connection with the internal WLAN interface:
auto lo
iface lo inet loopback

iface eth0 inet static    # use wlan0 instead of eth0 for kernel 2.6.10
   wireless_mode managed
   wireless essid yourESSID
   wireless_enc on
   wlan_ng_hostwep false
   wlan_ng_default_key_id 0
   wlan_ng_authtype sharedkey
   wlan_ng_key0 18XXXXX_Your-WEP-Key_XXXXX14

   address 192.168.0.16       # modify to your situation
   netmask 255.255.255.0      # modify to your situation
   network 192.168.0.0        # modify to your situation
   broadcast 192.168.0.255    # modify to your situation
   gateway 192.168.0.1        # modify to your situation
Then enter:
   ifdown -a
   ifup lo
   INTERFACE='eth0'    # eth0 for internal WLAN; eth2  for Cisco Aironet card
   iwconfig $INTERFACE essid YourESSID
   iwconfig $INTERFACE key 18XXXXX_Your-WEP-Key_XXXXX14
   iwconfig $INTERFACE channel 6
   ifup $INTERFACE
Should you have installed picoFirewall, you will need some extra-commands, in order to tell picofirewall, that your interface to the internet has changed:
iface=`cat /etc/picofirewall/picofirewall.conf | grep ^IFACE= | cut -d= -f 2`
if test "$iface" != "$INTERFACE" ; then
   pfconf='/etc/picofirewall/picofirewall.conf'
   cat $pfconf | sed s/IFACE=$iface/IFACE=$INTERFACE/ > /tmp/pfconfnew.$$
   mv /tmp/pfconfnew.$$ /etc/picofirewall/picofirewall.conf
   /etc/init.d/picofirewall start
fi
You probably want to include the code above in a script - I will put more information on this page about I have done this soon.
Suspend to RAM / Suspend to disk
Suspend to RAM works fine with kernel 2.6.11 - first enter in the file
/boot/grub/menu.lst the line
# kopt=root=/dev/hda7 ro resume=/dev/hda6 ro root=/dev/hda7 ro resume=/dev/hda6vga=normal acpi_sleep=s3_bios
where in my case hda7 is the partition with the root-directory and hda6 is the
partition with the swap partition (see in your file /etc/fstab).
Now, as user=root just enter the command:
echo mem >/sys/power/state
In order to wake-up the machine, press the power-button (now blinking every
couple of seconds in orange color). The button will then light in green color
and after about 1 minute and 43 seconds the machine will be up again - including
the network!
Now I could speed-up things: Having entered the
following in the file
/etc/X11/XF86Config-4:
Section "Device"
        Identifier      "Generic Video Card"
        Driver          "i810"
#next line for suspend-to-RAM working properly:
        Option          "VBERestore"    "true"
EndSection
With this, the laptop now resumes operation after about 40 seconds! Well, it
works most of the time, but not always... And: Be prepared, that the system-load
will be very high during the first few seconds after the resume...
Powernowd
Saving power while on battery (and while thinking or reading) can be done by
installing 'powernowd', should you have a 2.6 kernel. This installation and
configuration is described on our page
http://www.seismo.ethz.ch/linux/debian_software_installation.html.
The corresponding tool to turn powernowd on and of, is described on our
page powernowd-toggle.
Please note, that obviously the maximum speed of the CPU is determined somehow during the boot process: I noticed the following behaviour:
Booting while AC is connected: Min. CPU frequ. is 136 MHz, max. is ~1100 MHz
Booting while on battery     : Min. CPU frequ. is 74 MHz, max. is ~600 MHz
So, with 'powernowd' enabled, the Vaio laptop often slows down a CPU frequency of about 74 MHz or 136 MHz (compared to 1.1 GHz while in full speed), thus producing less heat (see with: cat /proc/acpi/thermal_zone/ATF0/temperature once ACPI is installed) and especially consuming less power.
Brightness of the screen
The Vaio has an excellent screen, also usable outdoors. However, indoors its brightness is rather high. In order to dim the screen, I first did the following:
1. modprobe sonypi
2. add a line with 'sonypi' in /etc/modules
3. apt-get install spicctrl
4. Enter 'spicctrl' to see the options
However, the brightness of the screen could not be modified with this software. The solution, which worked, was as follows:
1.  Download the driver sony_acpi, available on http://popies.net/sonypi/
    on a link at the bottom of the web-page
2.  Download sony_acpi.tar.gz
3.  gunzip sony_acpi.tar.gz
4.  tar xvf sony_acpi.tar
5.  cd sony_acpi
6.  make (ignore the warning messages)
7.  as root do: cp sony_acpi.ko /lib/modules/2.6.11-1-686/kernel/drivers/acpi/
    (where you have to use your kernel-version, if yours is not 2.6.11-1-686)
8.  depmod -a
9.  modprobe sony_acpi
10. Now you find an entry in /proc:  /proc/acpi/sony/brt
11. The value of /proc/acpi/sony/brt may be between 1 (relatively dark) and 8 (bright)
12. The brightness of the screen may now be dimmed a bit with the command:
    echo "4" > /proc/acpi/sony/brt
13. My thanks to Stelian Pop, who wrote this driver!
For my convenience I wrote a script to do this and added an icon on the Desktop,
which starts this script. I'll be glad to mail it, should anybody be interested.
Bluetooth
Since I do not use Bluetooth on my Vaio, I cannot give recommendations here.
However, I wanted at least to turn off the bluetooth interface in order to
save power.
What you in order to do this, is the following:
1. modprobe sonypi
2. add a line with 'sonypi' in /etc/modules
3. apt-get install spicctrl
4. Enter 'spicctrl' to see the options
Then enter as root spicctrl -L in order to see the bluetooth power (you will get the number 255). Now set the bluetooth power to zero with:
#!/bin/sh -e

# /etc/init.d/local_settings      Urs Kradolfer, 20Mar2005, 15May2005

case "$1" in
start|restart)
#  Set screen-light to medium strength:
   test -x /usr/local/sbin/dimselect && echo 4 | /usr/local/sbin/dimselect
#  Turn off bluetooth interface:
   test -x /usr/bin/spicctrl && spicctrl -l 0
    ;;
stop|reload|force-reload)
    ;;
esac
... and of course you need the corresponding link:Links
http://www.linux-on-laptops.com/sony.html
http://xyxyx.org/laptop-sony-vgn-t1xp/
http://usefulinc.com/edd/notes/UbuntuOnSonyVaioTRSeries
http://markadavis.org/vgnt150.html
Last Update: 23May2005 uk - Created: 10Mar2005